
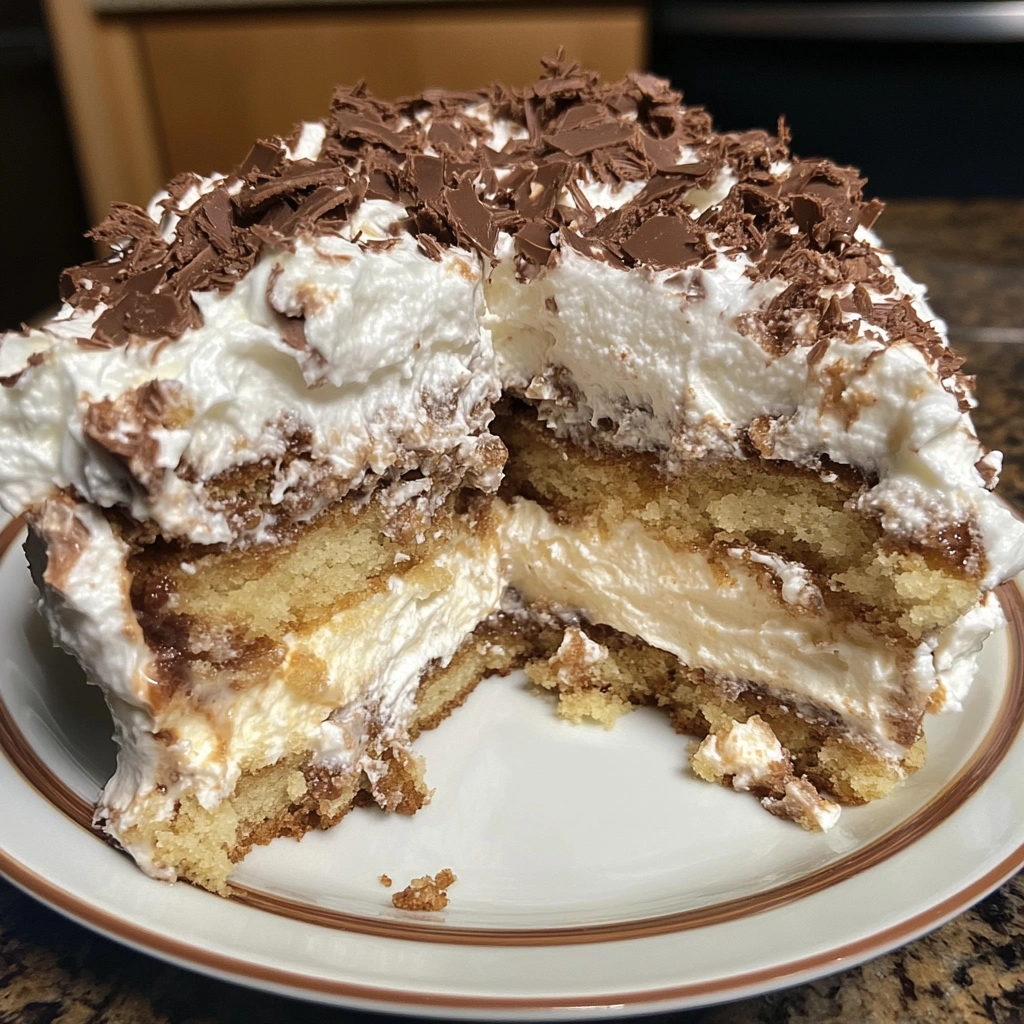
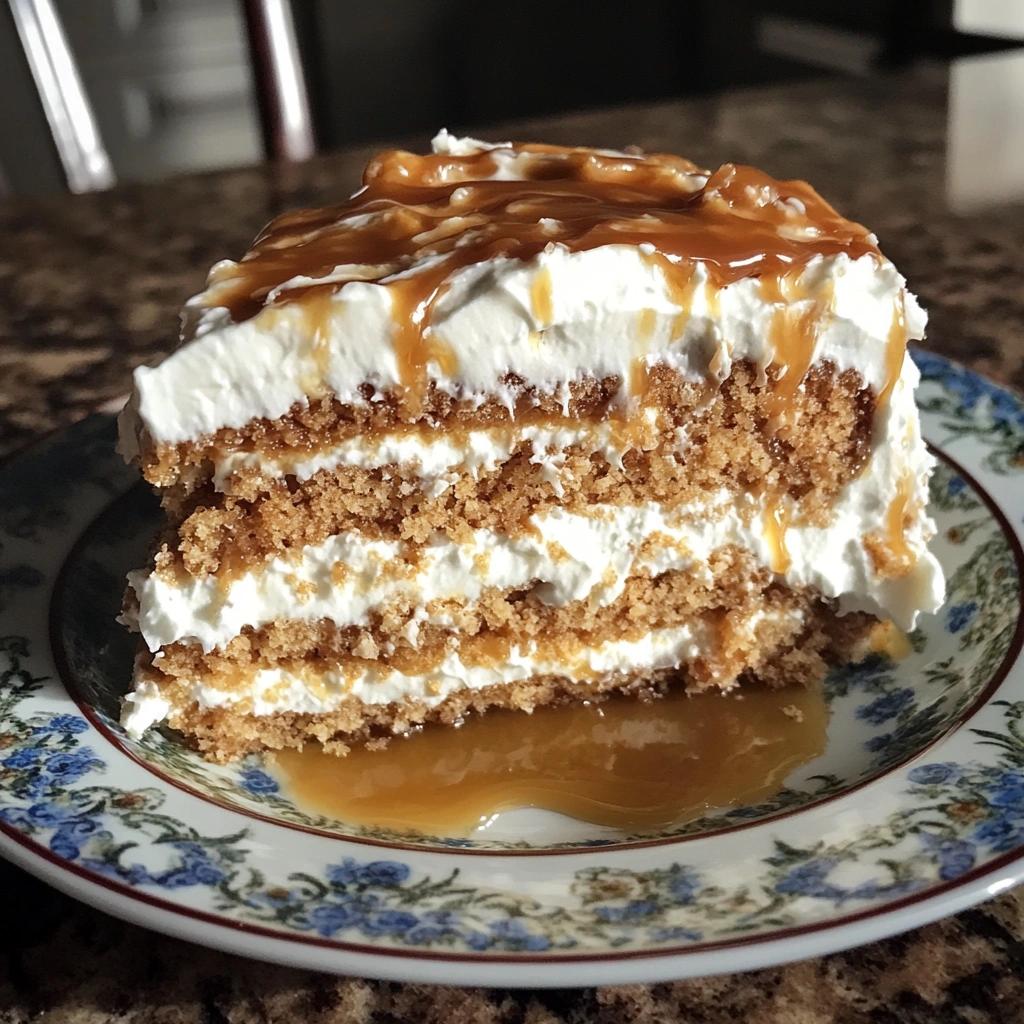
The Do Nothing Tornado Cake is the perfect example of a low-effort, high-reward dessert. This poke-style cake is loaded with flavor thanks to layers of sweetened condensed milk, caramel topping, and a fluffy whipped topping. The name itself hints at how little effort is involved in creating such a crowd-pleasing treat—no complicated steps, no rare ingredients, and no special baking skills required.
Unlike traditional cakes that call for multiple mixing bowls, frosting techniques, or decorations, this cake keeps things incredibly simple. With just a boxed yellow cake mix and a few store-bought ingredients, you’ll create a dessert that tastes like you spent hours in the kitchen.
Why You’ll Love This Cake
This recipe has something for everyone. Whether you’re a beginner in the kitchen or just don’t have time for elaborate desserts, this is a no-fail option that delivers every time. Here’s why it works:
- Only five simple ingredients required
- No complicated baking skills or equipment
- Perfect for gatherings, potlucks, and holiday events
- Can be made ahead of time
- Easy to customize with nuts or different toppings
- Rich, moist, and creamy texture in every bite
How It Got Its Name
The term Do Nothing Cake has roots in vintage American baking. The idea was to create a dessert that was almost effortless, requiring no more than basic pantry staples. Over the years, various versions have emerged, but the “tornado” twist—referring to the swirling effect of the caramel and condensed milk soaking into the cake—adds a fun, flavorful layer to the original.
Tools You’ll Need
To make this cake successfully, you’ll need a few basic kitchen tools:
- 9×13 inch baking pan
- Mixing bowl
- Electric mixer or whisk
- Wooden spoon handle or fork (for poking holes)
- Spatula (for spreading the topping)
Why These Tools Matter
- 9×13 inch pan: Ensures the cake bakes evenly and offers enough depth for the milk and caramel to soak in properly.
- Wooden spoon or fork: Allows you to poke uniform holes without tearing the cake apart.
- Spatula: Helps you spread the whipped topping smoothly without disturbing the caramel layer.
- Electric mixer: If your cake mix requires beating, this saves time and ensures a fluffy texture.
Preparation Tips
Even though this is a very forgiving recipe, following a few key tips can elevate your results:
- Let the cake cool completely before adding toppings to prevent melting.
- Thaw whipped topping in the refrigerator instead of the counter for better consistency.
- Poke holes evenly across the entire cake to allow thorough soaking.
- Chill for at least one hour before serving to enhance the flavor and texture.
Ingredient List
Here are the exact ingredients you’ll need:
- 1 box yellow cake mix
- 1 (14 ounce) can sweetened condensed milk
- 1 (12 ounce) jar caramel topping
- 1 (8 ounce) container frozen whipped topping, thawed
- 1 cup chopped pecans or walnuts (optional)
Each ingredient plays an important role in the final texture and flavor of the cake. The yellow cake mix forms the base, the condensed milk adds richness and moisture, the caramel provides a buttery sweetness, and the whipped topping finishes it all with a light, creamy touch. The nuts add a bit of crunch, though they are entirely optional.
Step-by-Step Instructions
Follow these easy steps to put everything together:
- Prepare the Cake Base
- Preheat the oven and mix the yellow cake batter according to the instructions on the box.
- Pour the batter into a greased 9×13 inch baking pan.
- Bake according to the box instructions, then let the cake cool completely.
- Poke and Soak
- Once the cake has cooled, use a wooden spoon handle or fork to poke holes all over the top.
- Slowly pour the sweetened condensed milk over the cake, making sure it seeps into the holes.
- Add the Caramel Layer
- Drizzle the caramel topping evenly across the surface of the cake.
- Spread the Whipped Topping
- Gently spread the thawed whipped topping over the caramel layer using a spatula.
- Take care not to disturb the underlying layers for a smooth, clean finish.
- Optional Garnish
- Sprinkle chopped pecans or walnuts over the top for extra texture and flavor.
- Chill and Serve
- Place the cake in the refrigerator for at least one hour before serving.
- This chilling time allows the flavors to meld and the layers to set.
Serving Suggestions
Serving this cake correctly enhances its creamy texture and rich flavor. Although the recipe is simple, thoughtful presentation can elevate the experience.
Best Practices for Serving
- Serve chilled
The cold temperature firms up the topping and enhances the creamy contrast with the moist cake. - Use a sharp serrated knife
A serrated blade will help cut through the soft topping and layered base cleanly. - Clean the knife between cuts
This ensures tidy portions and prevents mixing layers. - Portion control
Due to its richness, smaller servings are ideal. The 9×13 inch pan typically yields 12 to 15 portions. - Top with fresh garnishes
A few chopped nuts, a drizzle of extra caramel, or even a light dusting of cinnamon can add extra flavor and visual appeal. - Serve with drinks
Coffee, milk, or a dessert wine makes a great pairing.
Optional Presentation Ideas
- Serve on a dessert platter with a swirl of whipped cream on the side
- Add a maraschino cherry for a retro look
- Plate with a scoop of vanilla or butter pecan ice cream
- Place individual portions in ramekins for single-serve elegance
These small touches can make your simple cake feel like a restaurant-quality dessert.
Common Mistakes to Avoid
Even with its simple instructions, some missteps can affect the final result. Avoiding these will help you get perfect results every time.
Not Letting the Cake Cool Completely
Warm cake can melt the whipped topping, making the surface runny and the layers unclear.
Not Poking Enough Holes
The signature of this cake is its moist interior. If you don’t poke enough holes, the condensed milk won’t spread evenly, leading to dry spots.
Pouring Too Quickly
Adding condensed milk and caramel too fast prevents proper absorption. Always pour slowly and evenly across the surface.
Skipping the Chill Time
The chill period is not optional. It sets the topping and gives the flavors time to meld. Cutting into the cake too soon may cause it to fall apart.
Overloading with Toppings
A heavy hand with nuts or caramel can overwhelm the balance of flavors. Aim for just enough to add contrast and texture.
Side Dish Recommendations
Although the Do Nothing Tornado Cake is indulgent, pairing it with light or complementary sides can balance the meal. Here are eight excellent choices that contrast or enhance the cake’s flavor.
1. Fresh Berry Salad
A mix of strawberries, blueberries, and raspberries offers a tart counterbalance to the sweet cake.
2. Sparkling Lemonade
The tangy fizz refreshes your palate between bites of rich dessert.
3. Fruit Kabobs
Threaded grapes, melon, and pineapple provide a healthy and colorful contrast on the plate.
4. Cucumber Mint Salad
Crisp cucumber slices with fresh mint deliver a cooling, palate-cleansing side.
5. Toasted Almonds
Lightly salted almonds add crunch and a mild flavor that balances sweetness.
6. Greek Yogurt Parfaits
Layered with fruit and granola, these creamy treats offer protein and tang.
7. Mini Cheese Plates
Sharp cheeses like aged cheddar or blue cheese create a complex contrast with the cake’s sweetness.
8. Dessert Wine or Sparkling Rosé
A small glass of sweet or semi-dry wine can elevate the overall dessert experience.
Tips to Perfect the Recipe
Now that you know what to avoid and how to serve it, here are more expert tips to help you consistently make the best Do Nothing Tornado Cake possible.
- Use high-quality caramel topping
Cheap versions may be too runny or overly sweet. Choose one with a thicker texture and balanced flavor. - Refrigerate overnight for best results
Allowing the cake to chill longer deepens the flavor and improves texture. - Try different nuts or leave them out
Pecans and walnuts are traditional, but almonds or hazelnuts can work. Or skip nuts entirely for a nut-free version. - Add flavor extracts
A teaspoon of vanilla or butter extract added to the cake mix can boost the base flavor. - Whip your topping slightly before use
Lightly re-whipping thawed whipped topping can restore its airy texture if it has deflated. - Use homemade caramel sauce
For a more gourmet approach, make your own caramel for a rich, buttery depth. - Check ingredient labels
Especially if serving guests with allergies—some whipped toppings or caramel brands may contain allergens.
Recipe Tips for Maximum Flavor
Though the cake requires minimal effort, these tips will help you maximize flavor, texture, and presentation every time.
Use Room Temperature Ingredients
Let all cold ingredients—especially eggs, milk, and butter (if used in the cake mix)—reach room temperature before mixing. This results in a smoother batter and better cake texture.
Make It a Day Ahead
The flavor improves after resting. Refrigerate the finished cake overnight for a more balanced, fully-set result. It also saves time if you’re entertaining.
Try Flavor Enhancers
- Add 1 teaspoon of vanilla extract to the cake batter.
- Mix ½ teaspoon of sea salt into the caramel topping for a salted caramel twist.
- Use butterscotch instead of caramel for a different flavor profile.
Upgrade the Whipped Topping
For a richer texture, use homemade stabilized whipped cream instead of store-bought frozen topping. Whip 1 cup of heavy cream with 2 tablespoons of powdered sugar and 1 teaspoon of vanilla. Add 1 tablespoon of instant pudding mix for stabilization.
Toast the Nuts
If using chopped pecans or walnuts, toast them lightly in a skillet or oven. This brings out a deeper, nuttier flavor and enhances crunch.
Storage and Reheating Instructions
Storing Leftovers
- Refrigerator: Place the cake in an airtight container or cover tightly with plastic wrap. Store in the refrigerator for up to five days.
- Cut portions: Store individual slices in separate containers for grab-and-go convenience.
Freezing
Freezing is not recommended for this cake. The whipped topping may become grainy or separate once thawed. If you must freeze it, wrap individual pieces tightly in plastic and place in a freezer-safe container. Thaw in the refrigerator overnight before serving.
Reheating
This cake is best served cold. Reheating is not necessary and not advised, as it can affect the texture of the whipped topping and cause the caramel to become too runny.
Frequently Asked Questions
Can I make this cake in advance?
Yes. In fact, it’s highly recommended. The cake tastes better after chilling for several hours or overnight. This allows the condensed milk and caramel to fully soak into the cake, enhancing flavor and moisture.
Can I substitute the whipped topping?
Yes. You can use homemade whipped cream or a stabilized whipped cream instead of frozen topping. Just be sure to keep the cake refrigerated and consume it within three days for best results.
Can I use a different cake mix?
Absolutely. While yellow cake mix provides a buttery, neutral base, you can try:
- Chocolate cake mix
- Butter pecan mix
- White cake mix
- Spice cake mix for fall flavors
What’s the best way to poke holes?
Use the handle of a wooden spoon or a thick straw to poke uniform holes across the cake. Avoid using anything too narrow, like a toothpick, which won’t create enough space for the milk and caramel to soak in properly.
Can I make this nut-free?
Yes. Simply omit the nuts from the topping. For texture, consider alternatives like toffee bits or crushed pretzels.
How do I prevent a soggy cake?
Don’t over-pour condensed milk or caramel. Stick to the listed amounts and pour slowly, giving the liquid time to absorb. Avoid adding toppings while the cake is still warm.
Final Thoughts
The Do Nothing Tornado Cake is proof that you don’t need to spend hours in the kitchen to create a memorable dessert. With a handful of simple ingredients and a short prep time, this cake delivers maximum impact with minimal effort. It’s a recipe that works whether you’re baking on a busy weekday or preparing for a festive weekend gathering.
Its charm lies in its simplicity: a moist, tender cake base saturated with sweet, creamy layers and topped with a light whipped topping. There are no complicated steps, no special techniques, and no need for perfection. Every bite is rich, flavorful, and comforting.
It’s the kind of recipe you’ll come back to again and again—because it never fails, never takes too long, and always impresses.